How To Make a Kimono shirt

If you are a regular reader, you have probably noticed that I have a very simple style. I like simplicity. Simple items are easier to combine and at the same time they are timeless.
Taking a look to kimonos on the internet the other day I felt inspired. Typically, Kimonos have a T shape and the translation from Japanese would be “thing to wear” so I decided to use those two ideas to make a classy but simple summer shirt. Here is a simple description on how how to make a kimono shirt.
The fabric
Because this pattern will not give any shape to your body, you have to chose a  very thin fabric. Something that falls over your body because your body is going to create the shape of the shirt.
The perfect fabric would be silk ( georgette, grenadine, charmeuse…) or a very thin wool but you can consider any other cheaper alternative like thin cotton. In my case, the fabric I used is a synthetic one I had from a previous project (since it was kind of an experiment I didn’t want to use an expensive fabric).
Simple pattern
The pattern is very simple (you don’t even need one if you are a master of sewing). To draw it you have 2 options:
A. Take your measurements and draw a T
B. Use a large t-shirt you have at home and follow the contour to draw it.
I followed the second option so I will explain you some basic things you have to consider.
1. Place the t-shirt over the pattern making paper. Remember the pattern will have 2 pieces: the back and the front (in this case both will be identical but keep in mind that when taking your measurements you have to divide or multiply by 2)
2. Fold a little bit the sleeves until the shirt has a T shape (see picture below).
3. Draw the contour of the t-shirt.

4. you have the basic shape now but you have to make sure that:
– The shoulders line is straight
– The bottom is wide enough to put the shirt on (it will not have a zipper, buttons or any other opening. Just the hole for the head). My advice is, measure your breast contour and then add at least 2 cm. That is the widest part of your upper body so normally it should work.
– This shirt will have a boat neck so you can make it as wide as you like, going from shoulder to shoulder or just around the neck but make sure it is big enough. You can take as a reference other shirts or dresses you have.
For my shirt I made it 28cmx2 wide.
– The sleeves have to be as well big enough to move your arms but you can chose the length. I chose to make them 14cmx2 wide.

5. To be sure that the whole front is symmetric, I will fold the pattern making paper and I will cut it following only one of the sides I drew.

Cutting the fabric & sewing
The next step is very easy. Fold your fabric (remember you need 2 pieces, front and back) and place the pattern over it.

Now you can sew the parts together. I recommend you overcast all of the sides before. Either with the zig zag application of your sewing machine either with your overlock machine (Serger) if you are lucky to have one!

For the hems, I chose to do it with the sewing machine in the bottom and the sleeves. I made the collar by hand with invisible stitching.
Now the shirt is finished! it took me 1 hour to make the pattern and sew it. It is a very practical item and it can be very chic.

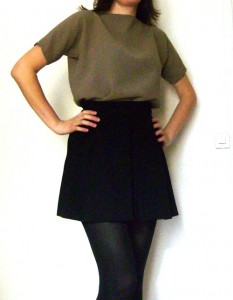
I plan to wear it this summer with white pants or a skirt and now during spring with a black skirt and stockings, spring is chilly up here in Sweden!
 Previous Post
 Next Post