How to make a circle skirt
A circle is the reflection of eternity
 You might think that a skirt is not the best item to wear in winter. I totally disagree.
You can use skirts all year around. I do it. Not only they’re feminine but also practical, comfortable and easy to make.
My secret to fight the cold is simply to use good warm boots and thick pantyhose.
The winter is already hitting Sweden and I want to renovate my skirt collection as well as add some colour to it.
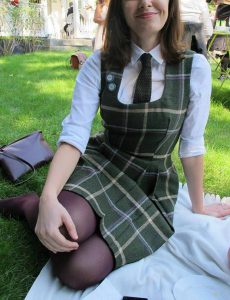
I found this seasonal fabric and immediately fell in love with it. Lately I am running a bit short of time, so I decided to make a circle skirt.Circle skirts are the easiest pattern skirt to make.
 The Material
1. Fabric
For my size (size M), I used 1,05 m x 75 cm (41,34″ x 29,5″) fabric (including extra fabric for the waistband and the seams). You will have to calculate the amount of fabric you will need for your own measurements once you draw the patterns.
Just a warning: circle skirts require a good amount of fabric.
2. Zipper
Choose the length and the colur of the zipper depending on your fabric. I have chose an normal black zipper 30 cm long.
3. Size and measurements
In order to make it easier for you to follow the instructions for the pattern, I will explain it according to my measurements. That means that when doing your own, you have to replace the figures in red with your measurements.
Waist 73cm
Skirt’s length 50 cm
Calculation for waist 73 cm – 3 = 70 —> 1/6 of 70 = 11,6 cm
Skirt length + 1/6 of the calculation for waist 50 cm + 11,6 cm = 61,6 cm
*Note: All measurements are in centimetres. You can follow exactly the same instructions just converting to inches.
Drawing the Pattern

We start by drawing just a half circle (folding the fabric when cutting it will give us the whole circle).
These are some simple instructions with the measurements to avoid any mistakes:

1. Draw a straight line (the green line in the picture).
2. From the middle point of that line (point A), draw a perpendicular one (from A to G) . Verify you get a 90 degrees angle ( that is the blue line in the picture)
3. Measure 1/6 of the calculation for the waist ( in my case 11,6 cm) from point A to B and from A to D. Link the points with a half circle. Here we have our waist!
4. Now, measure from A to E and from A to G the equivalent of the skirt length + 1/6 of the calculation for waist ( in my case 61,6 cm). Mark that length in several points and link them to draw the hem.
The last step is to draw the waistband. You just need to have a band with the length of your waist and the wideness you desire multiplied by 2 ( I chose 3 cm). We would fold it in the middle and sew it.
Sewing the Skirt
To cut the fabric, remember to do add the seam allowance: in my case 1 cm in the waistband and 3 cm longer for the hem.
If you are new in sewing, below there is some tips, help and some links that will help you to sew your circle skirt:

1. When taking measurements, it’s important to always take your natural waist measure. Later, during the pattern making process you will be able to sink the waist if you wish.
2. For the circle skirt you can choose either having a simple back seam or 2 seams, one on each side. My pattern is made with only a back seam.
3. You can chose buttons or a zipper to close your skirt but if you choose buttons you’d better add some extra centimetres ( 1 or 2 on each side) so it will close properly.
4. To cut the fabric, remember the seam allowance.
5. If you want to add a lining, the pattern will be the same as for the fabric.
6.. The waistband: Add some interface to the fabric to give it some body and rigidity. How to sew a simple waistband
7. Installing the zipper: how to sew a simple zipper
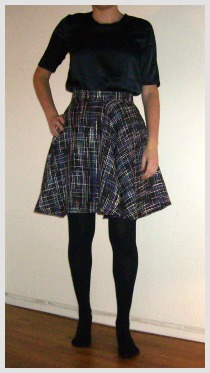
Enjoy your circular skirt and remember that you can contact me if you have any questions.
Happy sewing!
 Previous Post
 Next Post