
How to make a tie
How to make a tie
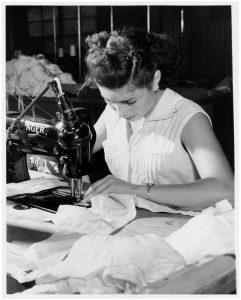
 Sewing has been always a hobby. At first I was sewing for my dolls and with the time I started sewing for myself: dresses, skirts, trousers… After a while it became more than a hobby and my curiosity led me to try other fields like lingerie or menswear. And eventually all this led me to make my first tie.
I always thought that the most difficult pieces to make were men’s clothes. I also feared that I would probably never be enough experienced to make them. Well, I was wrong!
My first project was a men’s shirt. Menswear is complicated. The details are very important very visible. That means that you have to be very meticulous. At the same time, doing menswear is the best way to improve you sewing skills, fitting skills and patience.
After the shirt, my next goal was men’s accessories and the result was amazing. Would you like to learn how to make a tie? below you will find a simple tutorial.
Are you ready?

Before we start, I will point out that below you will find the instructions to draw you pattern and some easy guide to sew your own tie. It is really easy! but if you don’t have much time or energy you can find the downloadable pattern and the instructions on my Etsy Store. Now, let’s get started!
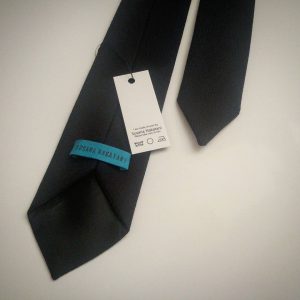
A tie with my own patterns
 For me a tie means elegance. Far from seeing it as a way to show one’s social status or job, I consider ties as a timeless item that always makes me of the1920’s elegant men the .
I took an old tie, cut it into pieces and created the pattern from that.
As you can see, the tie pattern will consist of 3 pieces ( it is blue fabric in the picture above) plus the lining. Because this was my first tie ever, I decided to do it as easier and simpler as possible so the fabric pieces will be the same for the fabric and the lining.
The Patterns
Since the most trendy and flattering neck ties at the moment are the skinny ones, that is the pattern I decided to do. If you want to go for a wider tie, you can modify the pattern by adding just a few inches/centimetres.
Remember that I am based in Europe so this tutorial is in centimetres but you can see the inches equivalence by using an online converter.
As I previously mentioned, if you think that drawing the pattern yourself or following these instructions is too complicated, check Susana Nakatani Etsy Store where you can find a downloadable tutorial and pattern or you can buy the paper version that will be sent by post to your home.

Drawing the pattern
In case you don’t want to destroy your boyfriend or husband’s tie, here are some little drawings you can follow to draw your tie.
")
")
") Cutting the fabric
Cutting the fabric
We are going to work with fabric, lining and interfacing* . In this case, I decided to ignore the interfacing just to make it easier. In the picture below you can see that the grey/blue fabric corresponds to the fabic and the coral is the lining (exact same pattern for both).
*Interfacing is a textile used on the unseen or “wrong” side of fabrics to make an area of a garment more rigid. They can be used to stiffen or add body to fabric, such as the interfacing used in shirt collars. Source: Wikipedia
Place each piece on the bias of the fabric, this is very important. To help yourself, when you draw the pattern you can draw a line guide for it.
The bias is the same as a 45 degrees angle from the grain. You have to place that way both the lining and the fabric. For the Interfacing the placement is not important since it has no grain.
Ready to sew
 We have all the parts ready so it is time to put them together.
If you decided to add interfacing, the first step is to fuse the interfacing to the inside of the fabric pieces.
Secondly, we start assembling the 3 pieces of fabric by sewing the edges with a half centimeter seam allowance (Let the corners hang off the edge a bit in order to assemble it correctly). Do the same with the lining.
Now it is time to sew together the fabric and the lining. After reading a bit on the internet I found an easy solution. I put together the pointy sides of the lining and the fabric and sew the top and the bottom ( letting the sides open) and once done, I turn it inside out.
As you can see in the picture, the next step is to fold 1 centimetre the long of the whole tie ( both sides)and press it gently. When pressing a tie, try do do it gently since it will look too flat and not beautiful if you iron it hard.
Once done, I fold both sides until they meet in the middle. Don’t forget to iron it as well.


The tie is almost ready. All you have to do now is to hand sew the central seam. I recommend you to use a ladder stitch or a blind stich.

As you can see, it is not complicated. You just need to be a bit meticulous and it can be the perfect present for your dad, husband, friends or even your kids if you adapt the length of the pattern.
The pattern and more detailed instructions are available for sale in my Etsy Store Susana Nakatani and in the link below. This is perfect for those of you that are novice or simply don’t have the time to go through all the process. You are also welcome to contact me if you have any questions susana@susananakatani.com
 Previous Post
 Next Post
Me gusto bastante.
SIEMPRE HABIA QUERIDO SABER COMO SE HACIAN. INTENTARÉ. UN SALUDO.
hola me gustaría tener los patrones de la corbata siempre he querido hacer una
Hola Sandra,
gracias por tu interés y tu comentario. Los patrones de la corbata son muy sencillos y para dibujarlos basta con que sigas las instruciones indicadas en el el blog. Si tienes alguna pregunta estaré encantada de ayudarte.
Saludos,
Susana
Hola, me encanta su lazo. se ve muy aseado.
Estoy planeando hacer un lazo como regalo de San Valentín para mi novio.
¿Podría usted por favor hágamelo saber qué material que utilizó; o cualquier otro material de calidad que podría utilizar.
espero que responda pronto. gracias
Hola,
Gracias por tu interés y por consultar mi blog. El material que utilicé fue simple algodón para la corbata y el forro puesto que fue la primera. En realidad se puede utilizar cualquier tela aunque si quieres una corbata de calidad yo te recomiendo seda y forro de acetato.
Un saludo y si tienes mas preguntas estaré encantada de ayudarte.
Hello! I loved the tie, i have been looking for a pattern and i found yours, i would love to get your actual pattern 🙂
Please let me know if you can help me out, Thank you!
Hello Chelsea, thank you for passing by. I will contact you by email shortly so you will have that neck tie pattern soon.
All the best,
Susana
Hey! I love this pattern and how you explained everything. I have attempted to make the pattern myself by using your measurements, but for some reason I just can’t get it perfect. Is there anyway you can email me the pattern?
Hi Candace!
Thank you for your comment. I am sorry to hear about the trouble drawing the pattern but no worries I will contact you by email to send it to you.
Best,
Susana
Hey, love the pattern, and I would love to make a tie for myself, but same trouble as Candace S. Could you send me the pattern via mail?
Thank you!
Hello Fatin,
Thank you so much for your interest. You can purchase the printable pattern in my Etsy Store:
https://www.etsy.com/listing/285917223/printable-necktie-tutorial-and-pattern?ref=shop_home_active_6
For a 20% off in the purchase add the code: TIEPROMO1 at check out.
All the best,
Susana
hola buen dia, me gustaria que me mandaras los patrones para poder hacer la corbata
Buenos dias Yazmin,
Muchas gracias por tu mensaje y tu interés. Si estás teniendo problemas para dibujar el patrón de la corbata, puedes compralo a través de mi tienda Etsy y te lo enviaré lo antes posible:
https://www.etsy.com/listing/234777227/neck-tie-pattern?ref=shop_home_active_1
Atentamente,
Susana
muy buena tu idea de corbata siento que te falta perfeccionarla ya que hay detalles que saltan a la vista en los acabados y para el molde de corbata si quieres te puedo dar el trazo con medidas para su realización y puedas hacer algo mejor sigue haciendo este tipo de tutoriales solo susténtalo un poco mas.
Hola Patty,
Gracias por tu comentario y tu interés. La idea de este tutorial es hacer una corbata para principiantes por eso tanto la idea como el patrón y la ejecución son básicos.
No obstante sería interesante crear otro tutorial más completo para un nivel y resultados más avanzados. Si deseas colaborar no dudes en ponerte en conacto conmigo: susana@susananakatani.com
Hi! Thank you for instructions))) I am trying to do it myself, could you send me the pattern? I’ll be very thankful!
Hello Ardak!
Thank you for your message and your interest. You can purchasse the pattern in my Etsy Store and I will send it to you as quick as possible:
https://www.etsy.com/listing/234777227/neck-tie-pattern
Hi. I love your tutorial. Thanks. Please can you send the pattern to me. Thanks
Good afternoon Idongesit,
Thank you for your message and your interest. You can purchasse the pattern in my Etsy Store and I will send it to you as quick as possible:
https://www.etsy.com/listing/234777227/neck-tie-pattern
Best regards,
Susana
Hola! Me encanta tu tutorial, es bastante claro pero lo que no logro entender es cómo unes las tres partes al biés, podrías subir o mandarme fotos de eso o explicarme mas o menos?
Es bastante urgente
Muchas gracias y gran trabajo!
Buenos dias Candela,
Gracias por tu interés y perdona que mi respuesta llegue con algo de retraso. No sé si tienes una larga experiencia con la costura pero intentaré ser lo mas clara y básica posible en mi explicación.Te enviaré en las próximas horas varias fotos por email con una explicación, espero que te sea útil.
Atentamente,
Susana
Hello Susana
I´m so thankful for your blog.
Thank you for your comment Angie!
Hi Susana,
I loved the pattern and the way you have explained every step. After a lot of surfing I finally found your blog and it was really helpful. I tried making the pattern myself but it didn’t turn out so well. Will it be possible to get an actual pattern on mail? Please do let me know. Thanks 🙂
Hello Gupta,
Thank you for your message and interest.
You can buy the downloadable version of the pattern from my Etsy Store:
https://www.etsy.com/se-en/listing/285917223/printable-necktie-tutorial-and-pattern?ref=shop_home_active_2
I hope it helps but if you have any questions, please let me know!
Have a great day,
Susana